Digital Forensics Computer
The Digital Studio's digital forensic computer is a free self-service facility supported by the University's Digital Scholarship team. If you have a large volume of media to image or analyse, or if you required support to undertake your analysis please contact the Data Forensics Lab.
-
Make a booking
You must book
If you haven't undertake any digital forensics work previously, it is recommended that you come for one of the Digital Studio's digital forensics clinics held monthly during the semester. For more information visit
-
Log-in
You will be provided a user name and password with you booking. You cannot use your own username as you won't be able to access the required forensic software.
-
Connect your media or device
The digital forensic computer in the Digital Studio has a Tableau Forensic Bridge and a 3.5" floppy disk drive.
Tableau Forensic Bridge
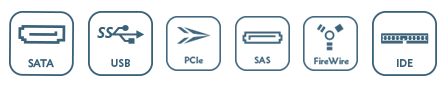
The Tableau Forensic Bridge is a write blocker, allowing you to access data on a device without accidentally damaging changing or effecting the contents. It supports a range of storage media and connection types.
Before connecting your device make sure that the green closed lock light is illuminated to indicate that write-block mode is active. Plug you media in your media and power if required.
If you do not have the necessary connectors and adaptors, they should be requested from the Digital Studio when booking, or with at least 48 hours advances notice.
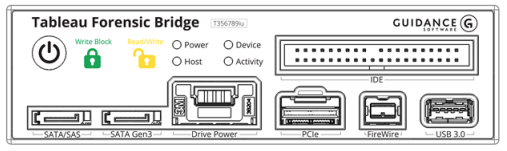
- Write Block: (green closed lock) write-block mode (read-only).
- Read/Write: (yellow open lock) read/write mode (enabled when DIP switch 1 is on).
- Power: when lit, the Universal Bridge is on.
- Host: when lit, the host computer is connected.
- Device: when lit, the connected device is powered and visible to the Universal Bridge.
- Activity: when lit, read or write activity is occurring on the connected device.
Documentation
3.5" floppy disk drive
Floppy disk are sensitive to dust, condensation, temperature extremes, and magnetic fields, and even if a floppy disk looks intact you may not be able to access the stored data.
Old floppy disks also often accumulate dust and mould. Before inserting a floppy disk into the drive slide the metal shutter to see if there is any foreign material on the surface of the disk. If foreign material is present, or if the metal shutter or another part of the disk is broken or damage, do not insert it into the drive as it may damage the disk, data, or the drive and subsequent disks.
-
Create an image
Once successfully connected, you can create a forensic image of your media. This can be done using FTK Imager or HFSExplorer if your media is Mac-formatted.
FTK Imager
FTK Imager is a data preview and imaging tool. Using FTK Imager you can create perfect copies (forensic images) of the data on your storage media/device without making changes. Using FTK imager you can:
- Create forensic images
- Preview files and folders
- Preview the contents of forensic images stored on the local machine
- Mount an image for a read-only view, to see the content of the image exactly as the user saw it on the original drive.
- Export files and folders from forensic images.
- See and recover files
- Generate hash reports to prove the integrity of your imaged drive
Documentation
HFSExplorer
HFSExplorer is an application that can read Mac-formatted hard disks and disk images. HFSExplorer allows you to:
- browse your Mac volumes (OS X hard drive; HFS+-formatted iPods; and HFS+-formatted .dmg / .sparsebundle files)
- extract files (copy to hard disk)
- view detailed information about the volume
- create disk images from the volume
Documentation
-
Undertake your analysis
The Digital Studio's forensics computer has Autopsy installed, an open source digital forensics platform that allows you to undertake analysis of the forensic images you have created.
Autopsy
Autopsy organises data by case. Each case can have one or more data sources, i.e. a disk image. You can have only one case open at a time, and the application can slow down when there are many large data sources in the same case.
To create a case, use either the "Create New Case" option on the Welcome screen or from the "Case" menu. This will start the New Case Wizard. You will need create a case name and identify a directory to store the case results into.
Once you have created a case, the common types of analysis include:
- Keyword Search to find files that mention relevant terms
- Search for common Web Artifacts – i.e. history, bookmarks, and cookies from Firefox, Chrome, and IE.
- Data Carving to recover deleted files from unallocated space using PhotoRec
- Extract EXIF metadata from image and sound files
- Timeline Analysis to find out about when a computer/volume was used or what events occurred before or after a given event
- Hash filtering to flag known bad files
- Scan a computer/volume using STIX
Documentation
-
Removing your files
Once you have completed your analysis remember to back-up any disk images or Autopsy case files onto your own storage device and delete them from the digital forensic computer.